Manage Your Leaves
Introduction
Managing leave allows employees to view their entitlements, apply for leave, track request statuses, and cancel pending applications when necessary. This guide provides clear instructions on using the leave management features effectively.
Accessing My Requests
For Super Admin, Leave Admin, and Leave Manager Roles:
- Click on the Leave option in the main navigation bar.
- Click on the My Requests sub-menu option under the Leave module.

For Employee Role in All Modules:
- On the Dashboard, locate the My Requests section upon logging in.
My Leave Allocation
View Your Leave Allocation
The My Leave Allocation section displays the leave types and entitlements assigned to you. Each card provides details such as:
- Leave Type (e.g., Annual Leave, Sick Leave).
- Available Balance and other relevant entitlement information.

Carry-Forwarded Balances
- Use the Year Dropdown to switch to the next year.

- Balances carried to the next year appear under the entitlements for that year.
If a leave card is disabled, it may be due to one of the following reasons:
- The leave type has been fully utilized.
- The allocation period has expired.
- No supervisor has been assigned.
Clicking on the disabled card will display the specific reason for its status.
Applying for Leave
Employees can apply for leave using Leave Cards or the Apply Leave Button.
Step 1: Open the Apply Leave Modal
Option 1: From Leave Cards:
- Click on an active leave card in the My Leave Allocation section.
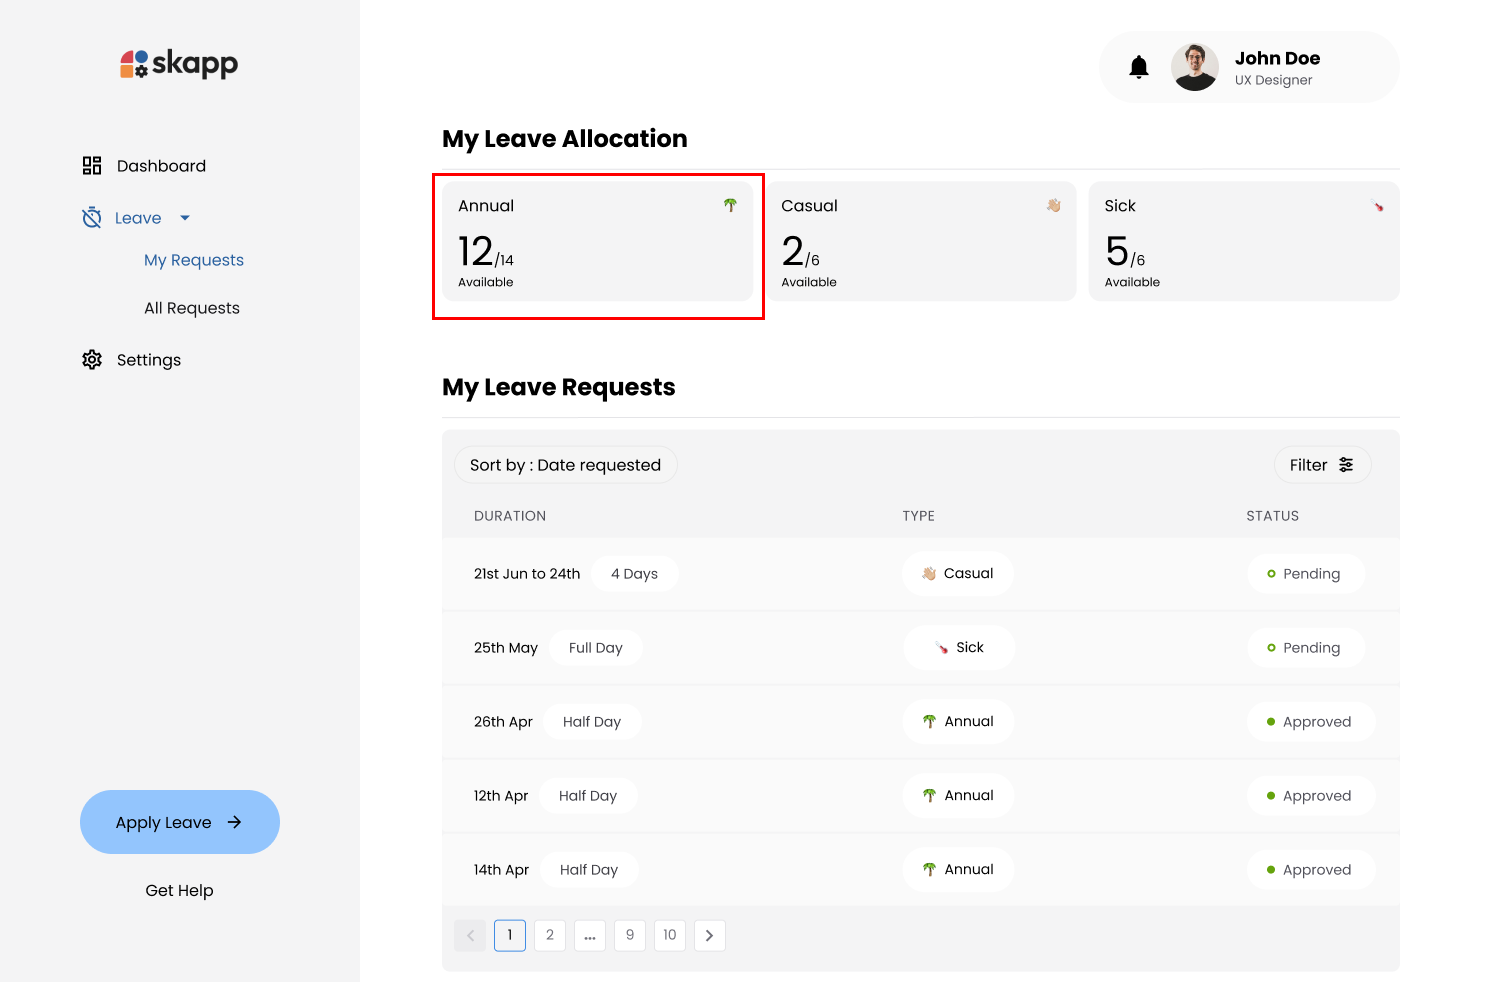
- This opens the Apply Leave Modal.
Option 2: From the Apply Leave Button:
- Click the Apply Leave button in the navigation bar.
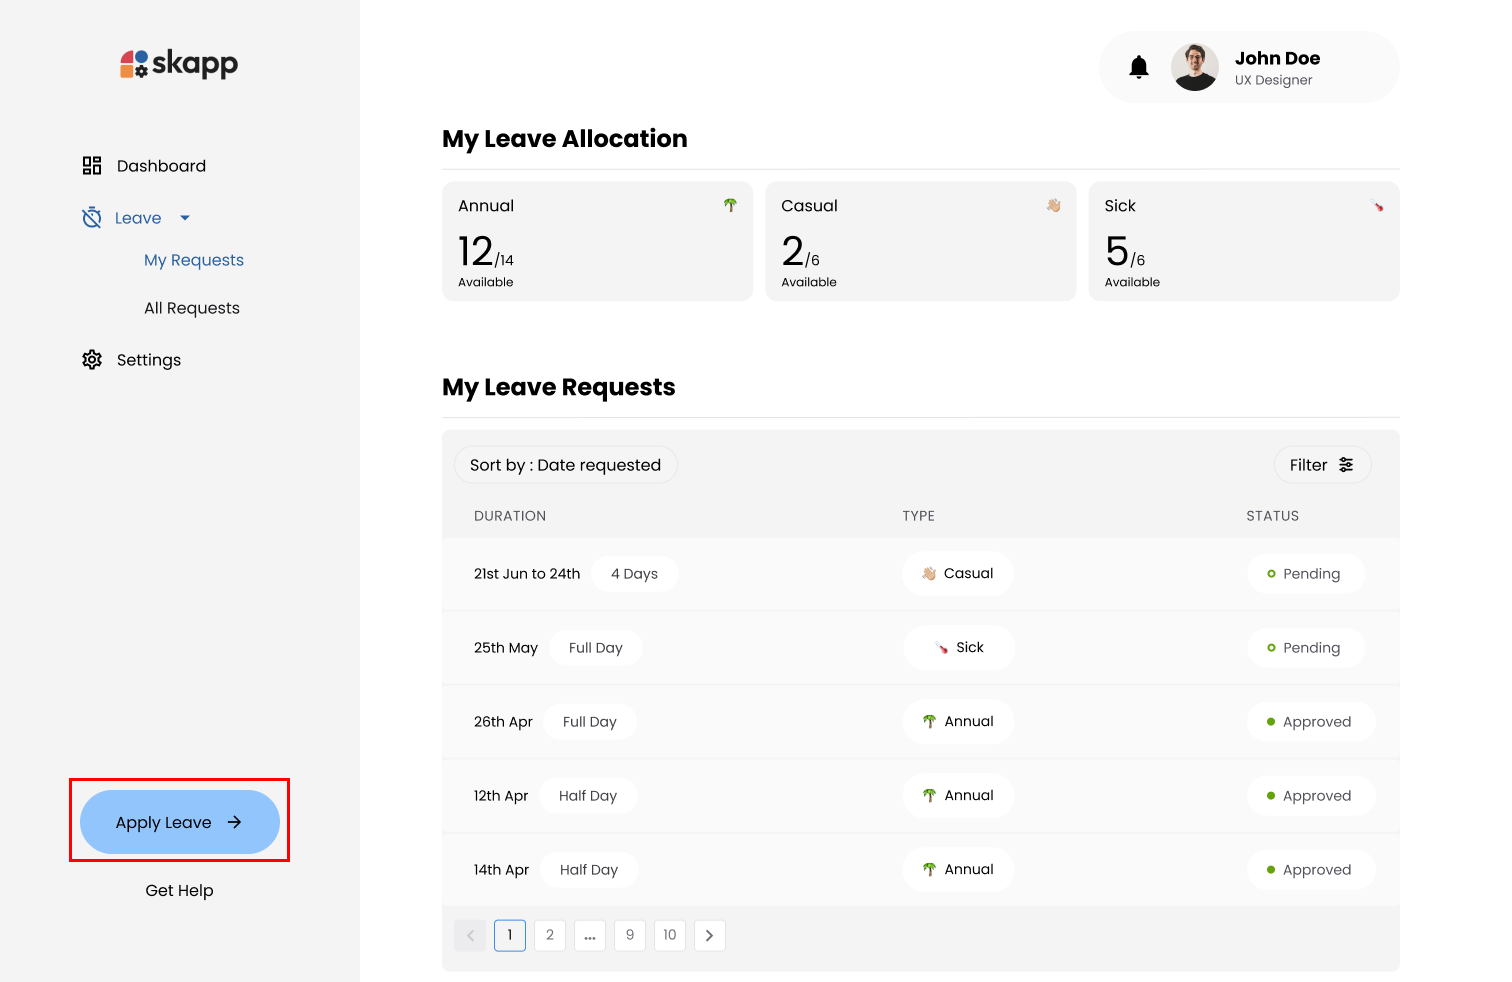
- Select a leave type in the My Allocation Modal, which will open the Apply Leave Modal.
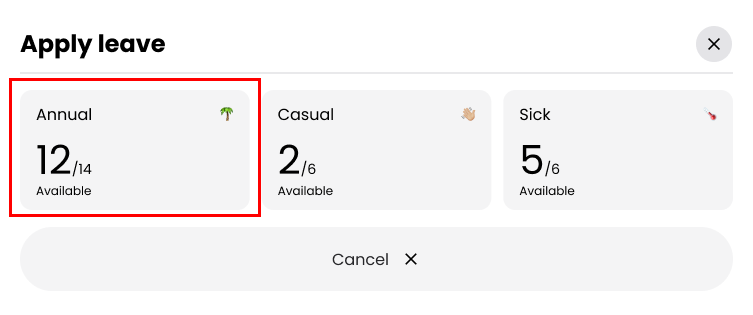
Step 2: Fill Out the Leave Details
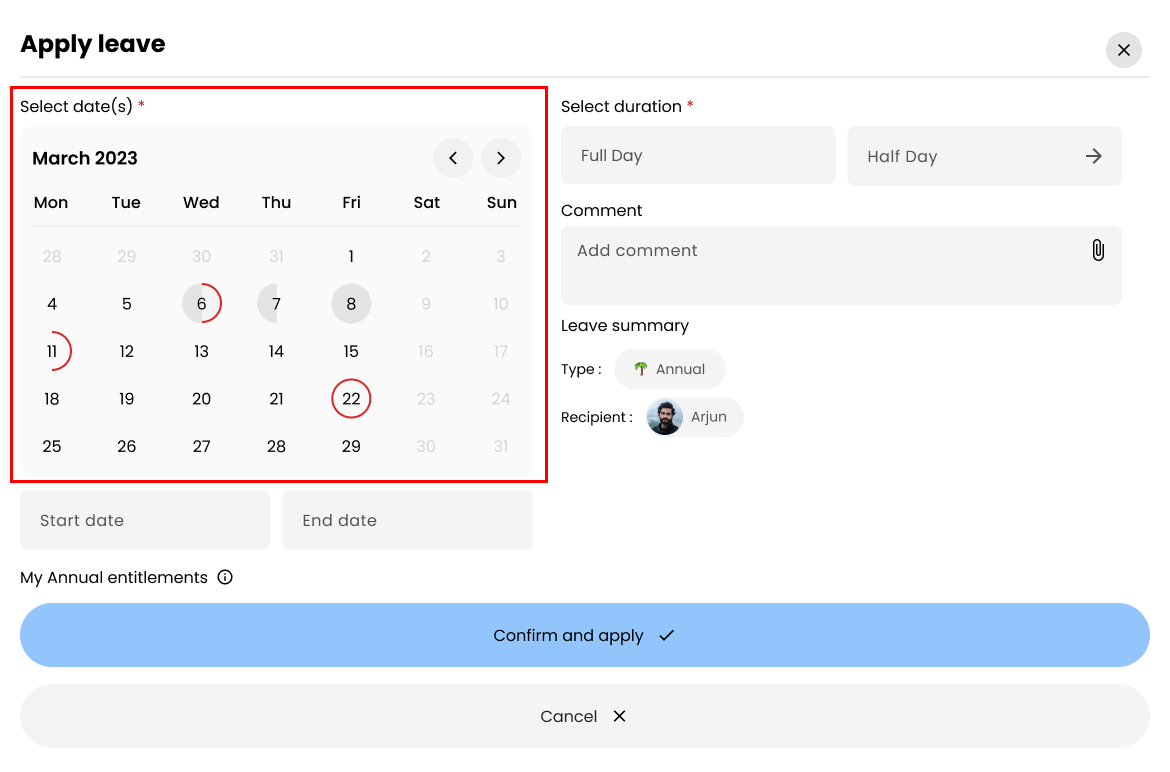
Select Date/s
- Use the calendar to pick eligible working days.
- Non-working days (e.g., weekends or company-declared holidays) are disabled.
- Previously requested leave dates will be highlighted, and further selection will be restricted.
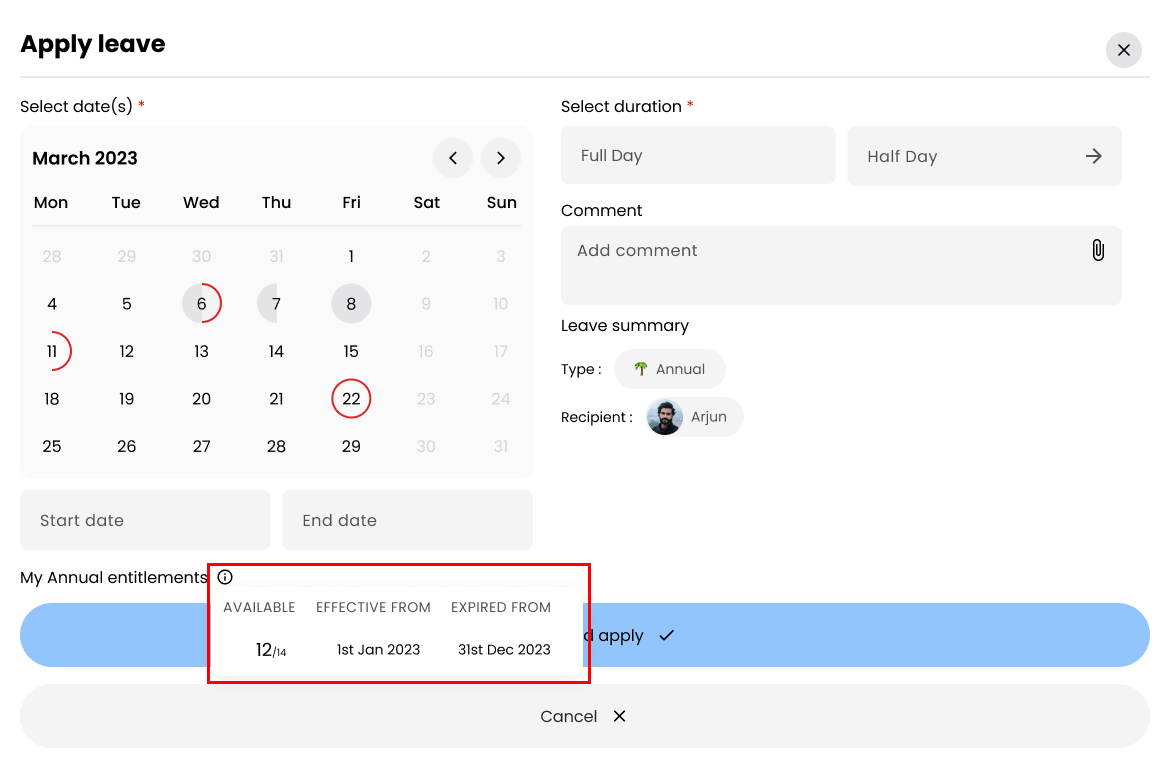
View Leave Entitlements:
- Hover over My (Leave Type) Entitlements to display:
- Available Balance
- Effective From Date
- Expiry Date
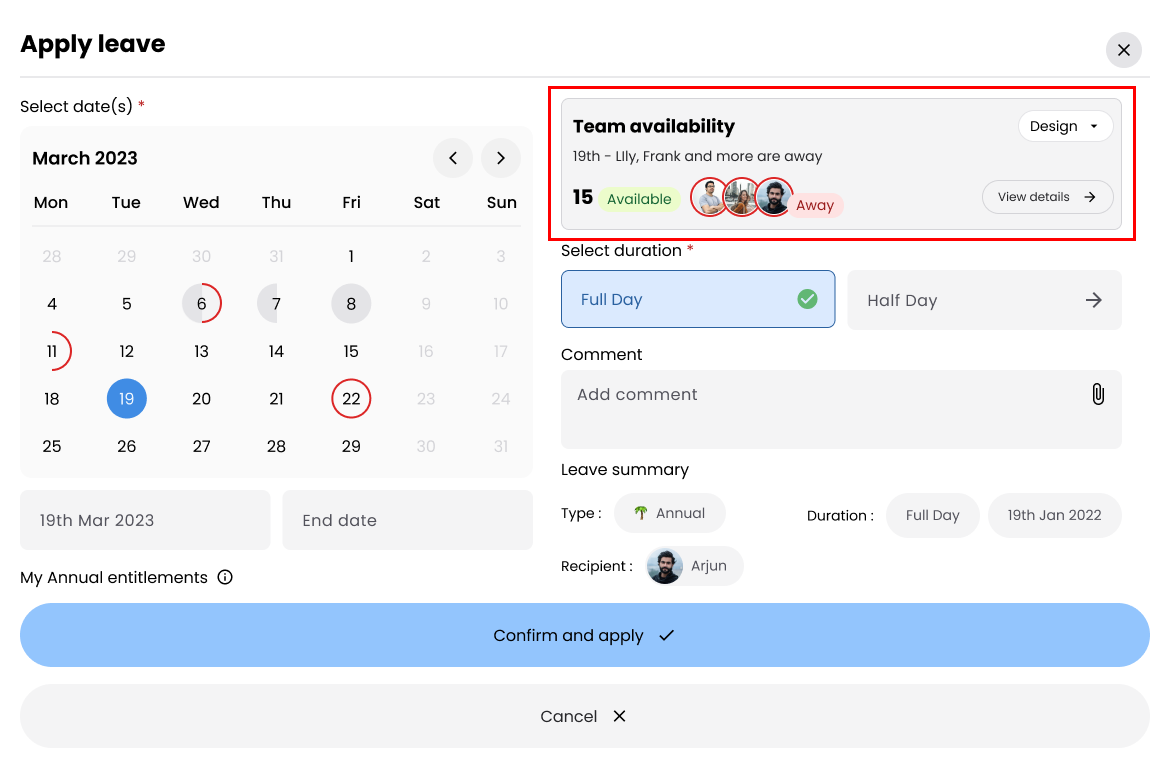
Check Team Availability:
- View your team’s availability for the selected dates.
- If you are not assigned to a team, this section will not be visible.
- Use the Team Selection Dropdown to switch between teams you are assigned to.
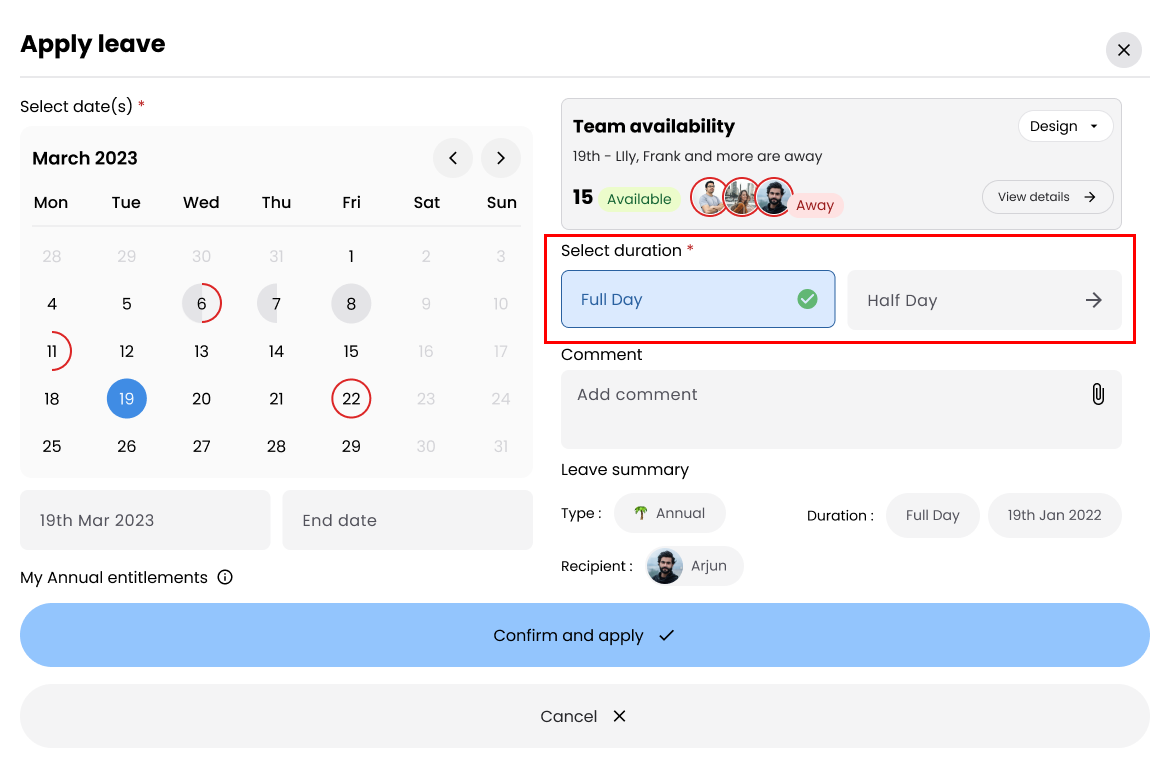
Select Leave Duration:
Choose the appropriate duration for the leave request:
- Full Day
- Half-day Morning
- Half-day Evening
Add Comments (If Required):
Add a comment if your organization requires comments for the selected leave type.
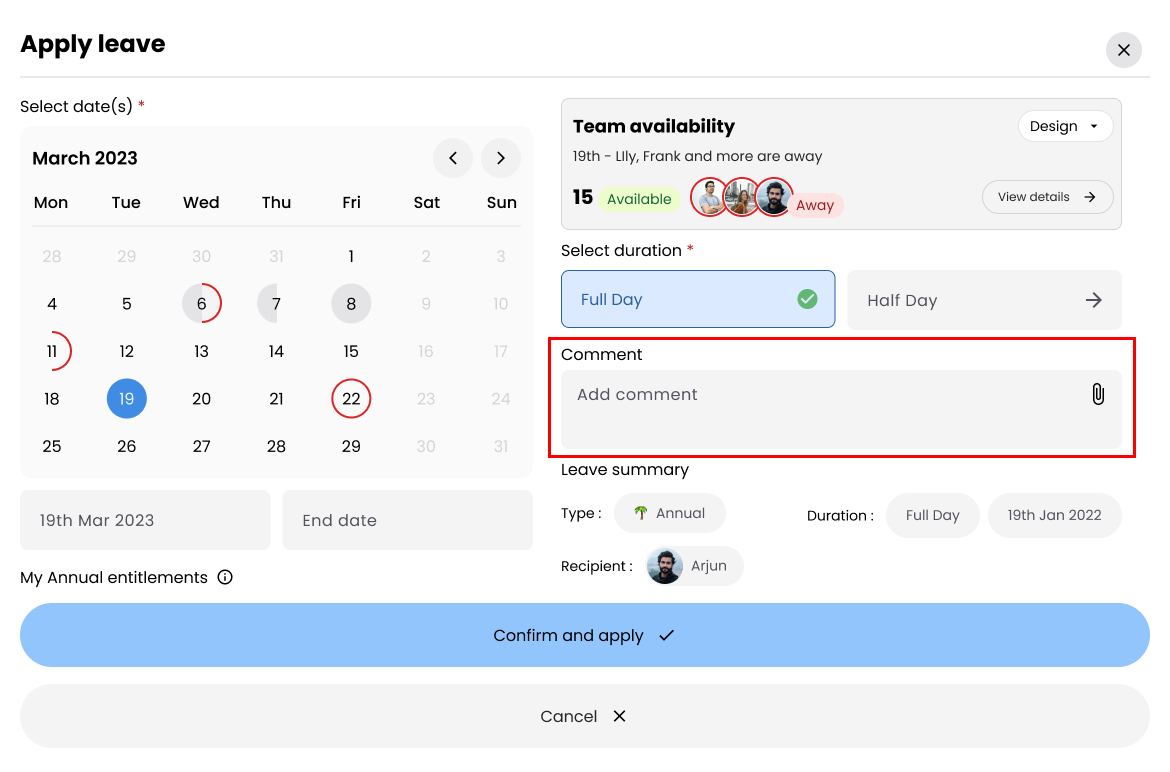
Attach Documents (If Required):
If attachments are required:
- Click the Attachment Icon to upload files.
- Ensure the files meet the following requirements:
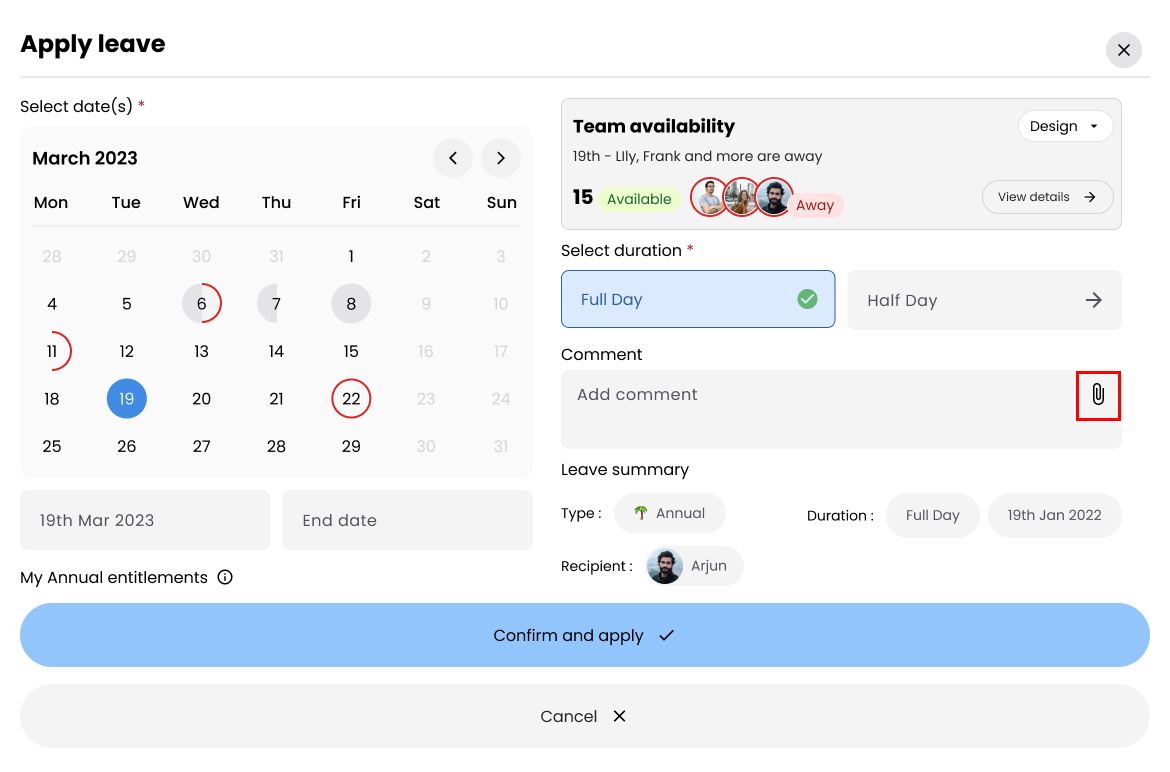
- File Formats: PDF, PNG, JPEG, JPG.
- Size Limit: Up to 10 MB per file; 5 files maximum.
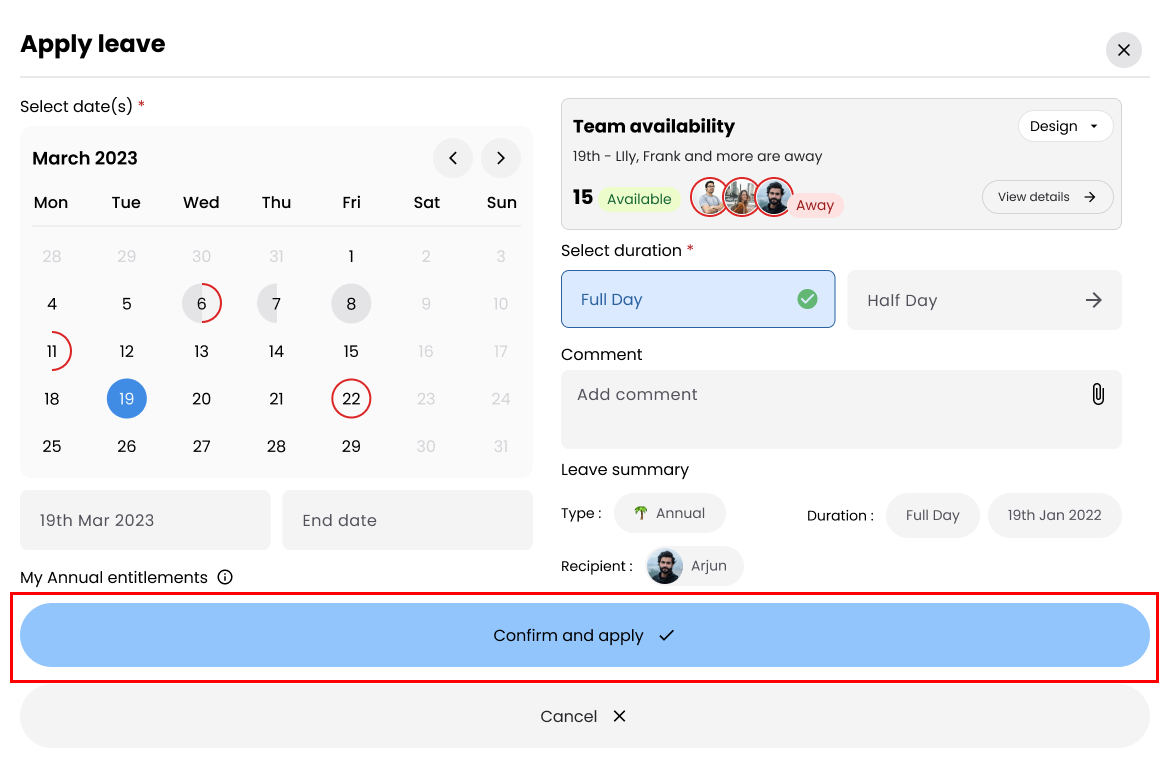
Step 3: Submit Leave Request
- Verify all details.
- Click Confirm and Apply to finalize your leave request.
Viewing My Leave Requests
Navigate to My Leave Requests
For Super Admin, Leave Admin, and Leave Manager Roles:
- Click on the Leave option in the main navigation bar.
- Click on the My Requests sub-menu option under the Leave module.
- Scroll down to the My Requests section.
For Employees in All Modules:
- On the Dashboard, locate the My Requests section.
- Scroll down to view your requests.
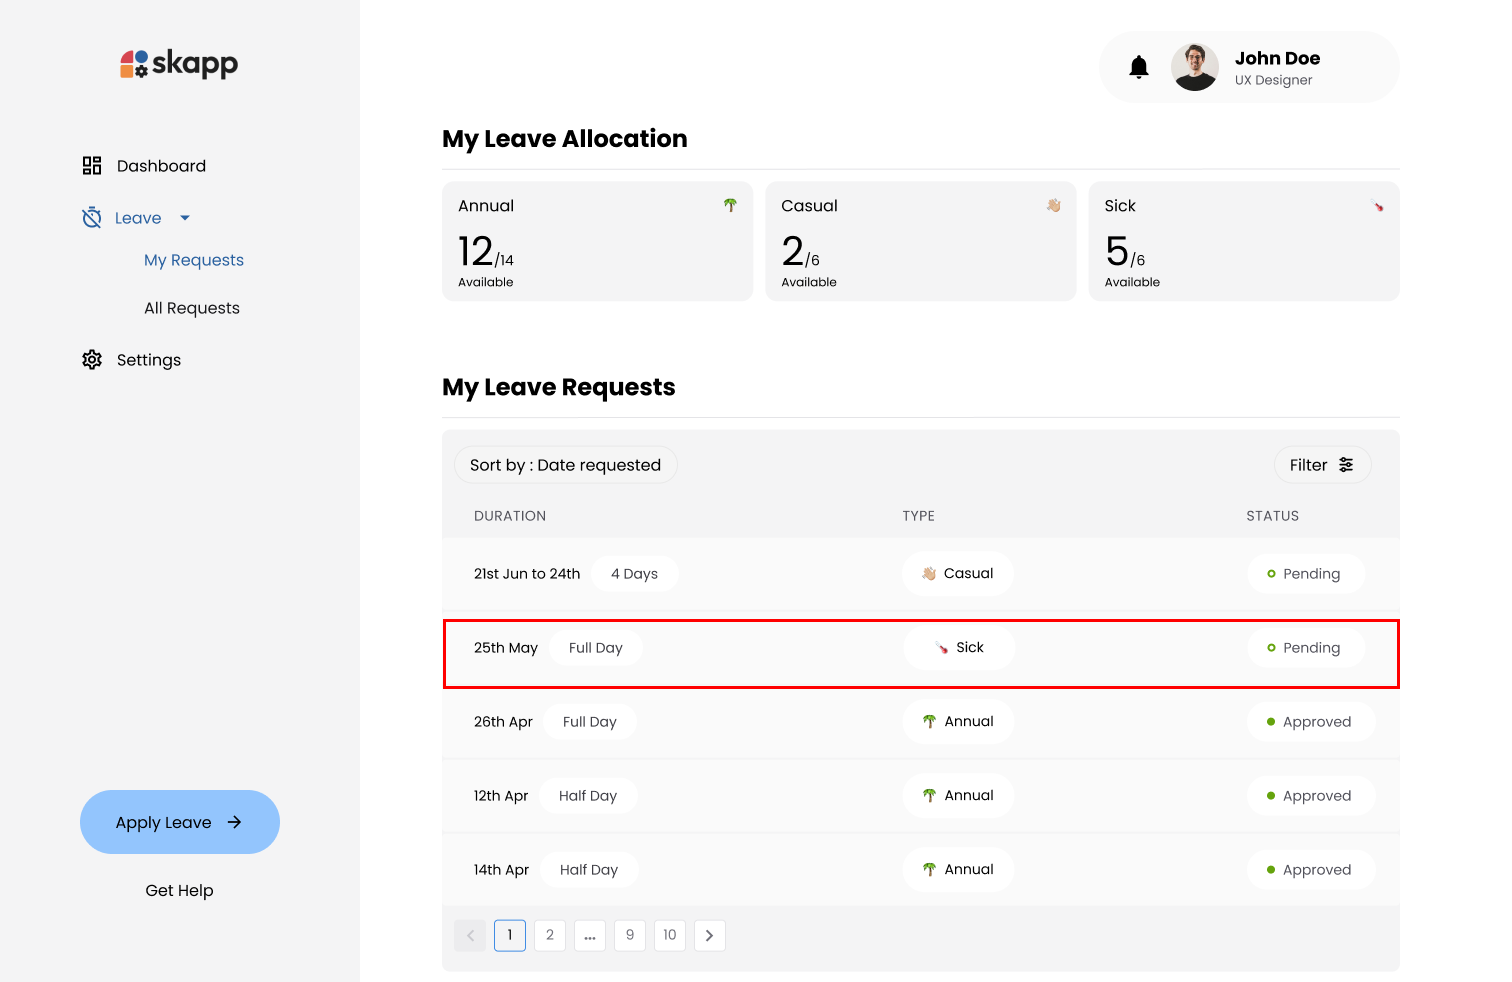
The My Leave Requests section enables you to track the status of submitted requests.
Cancelling Leave Requests
Step 1: Open the Leave Details Modal
- Click on a Pending Leave Request in the My Leave Requests table.
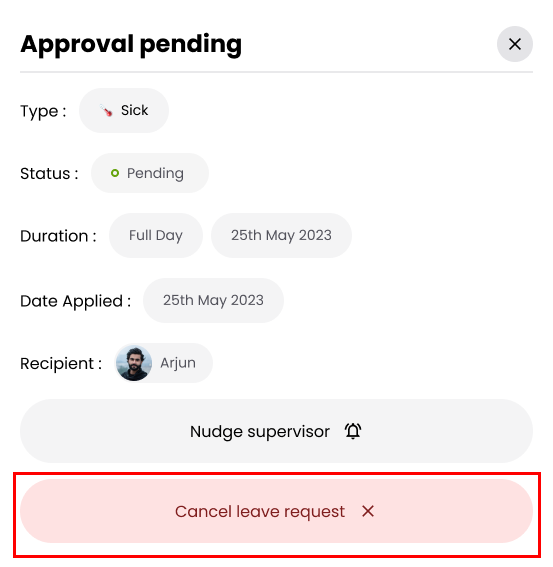
Step 2: Initiate Cancellation
- Click Cancel Request in the modal.
Step 3: Confirm Cancellation
- Confirm the action in the confirmation prompt.
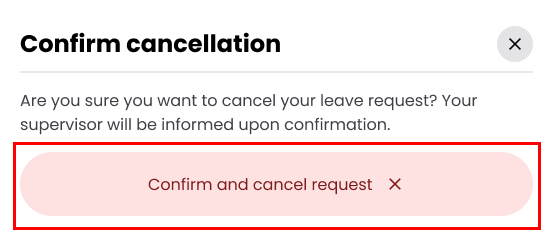
- The leave request will be canceled and removed from the pending list.