Add Users
Introduction
This guide provides a comprehensive walkthrough for adding, managing, and terminating users in the system. From configuring personal and employment details to handling terminations, these steps ensure accurate and secure user data management.
Accessing the Directory Page
- Users with the
Super AdminandPeople Adminroles can add users to the system. - Users with the
People Managerrole can only view the add users through directory.
- Navigate to the People option in the main navigation bar.
- Click on the Directory sub-menu option.

Adding Users (Quick Add)
Steps 1: Click on Add People Button
- Click the Add People button to open the Add People Modal.

Steps 2: Enter User Information
- Fill in the mandatory fields.
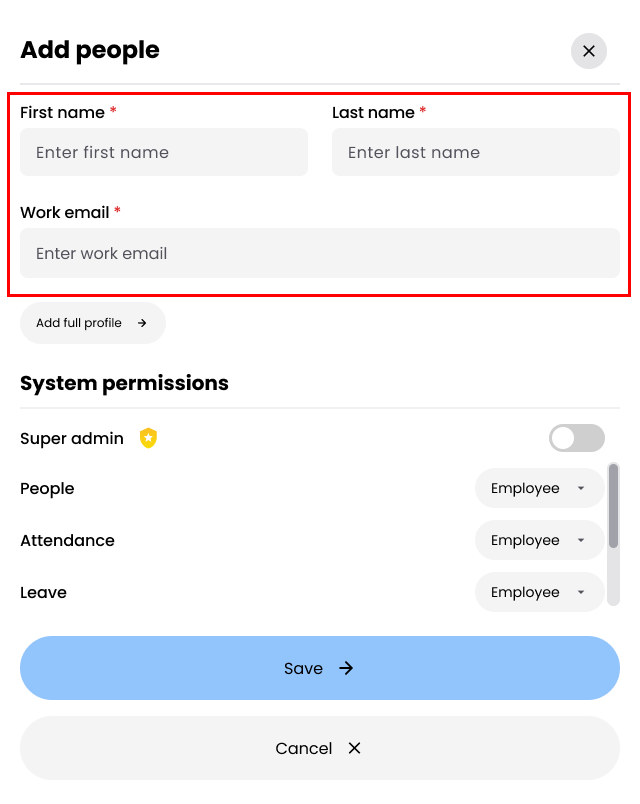
- First Name and Last Name: Required to identify the user in the system.
- Work Email: This serves as the unique identifier and will be used as the username for logging into the system. Ensure the email is valid and not duplicated.
- Set user permissions
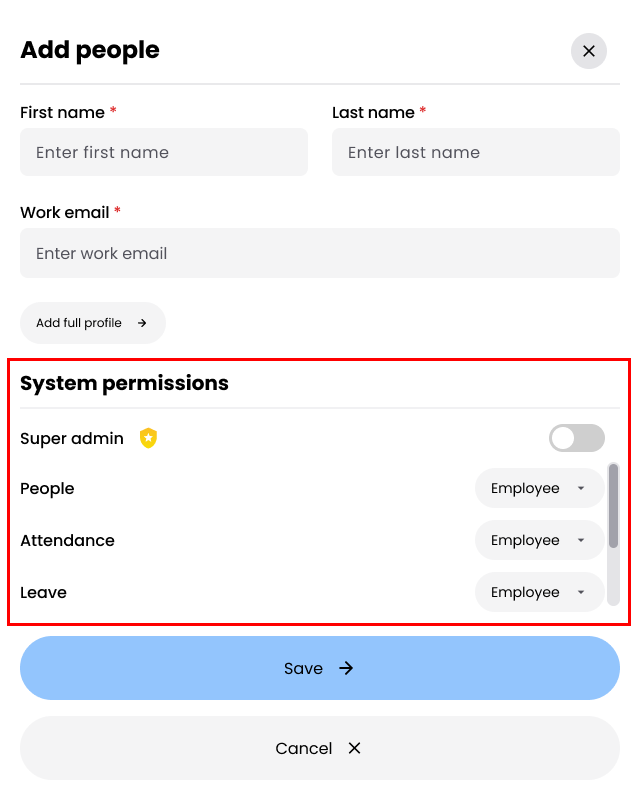
- Default role is Employee across all modules.
- Selecting Super Admin automatically assigns admin permissions for all modules.
Steps 3: Save the User
- Click Save to create the user.
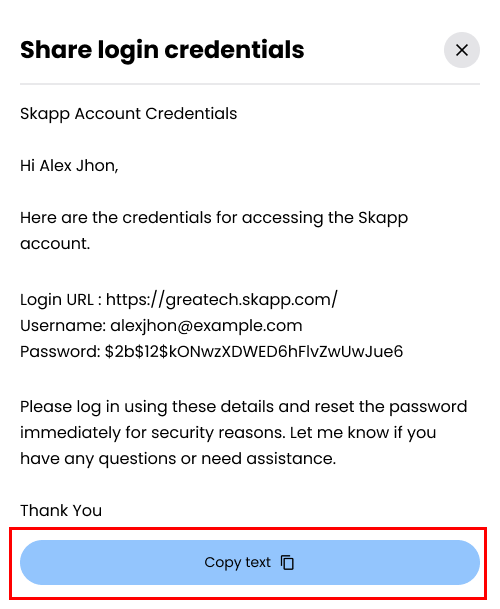
- The Share Credentials Modal appears with:
- Account URL: The login page link.
- Username: The user's work email.
- Password: A temporary password.
Steps 4: Share Credentials
- Click Copy Text to copy the credentials for sharing with the user.
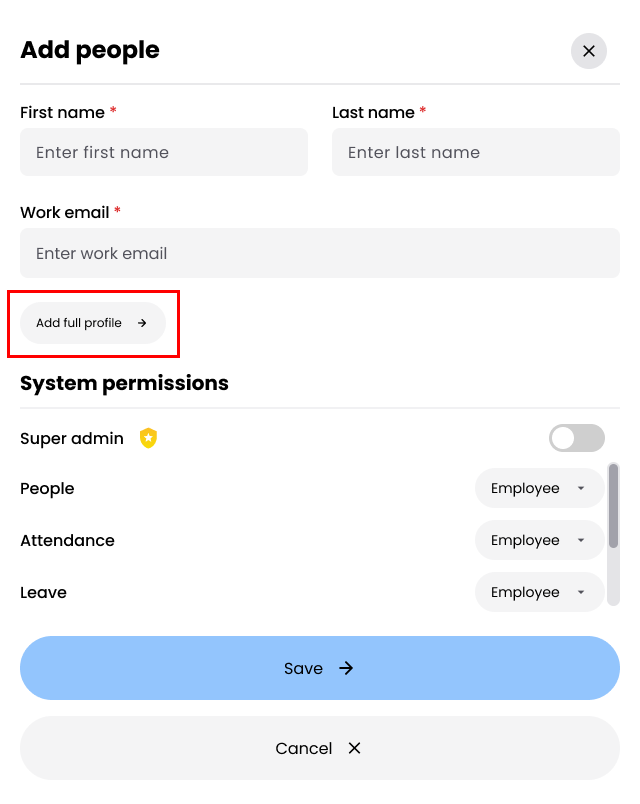
Click Add Full Profile to proceed to the add more details realted to the user.
Adding Users with Full Profile
The full profile process consists of five sections:
- Personal Details
- Emergency Details
- Employment Details
- System Permissions
- Entitlement Details
Users must complete each section in sequence and click Next to proceed to the next step.
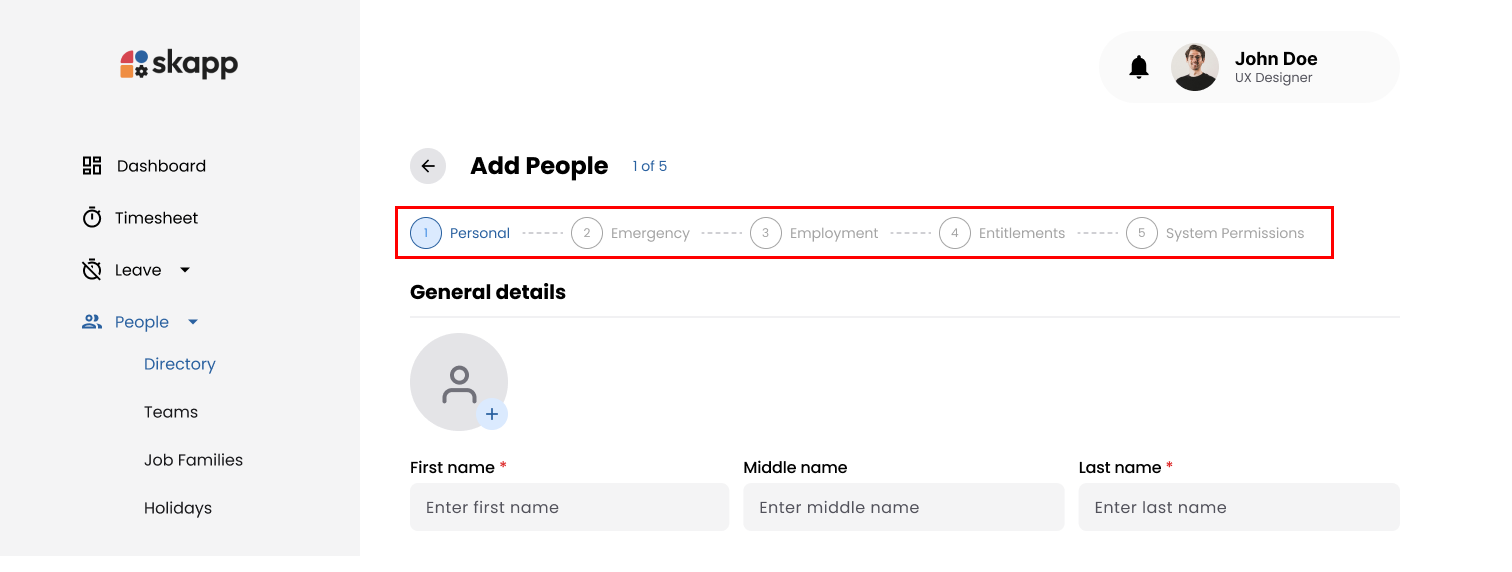
Step 1: Personal Details
- The Personal Details section collects general and contact information about the employee.
- First name and last name fields are mandatory
Step 2: Emergency Details
The Emergency Details section allows administrators to store primary and secondary emergency contact information.
Step 3: Employment Details
The Employment Details section records organizational and employement-specific information.
Work Email
- Mandatory
- This work email address and password will be used as the username for the user to logging into the system.
- This work email won't be able to edit after user loginto the application for the first time.
Primary and Secondary Supervisors
- Primary and secondary supervisors that will be assigning to the user will be getting all the leave and time request related to that user for approving and declining.
- Secondary supervisor field will be disabled untill user select a primary supervisor.
- To recieve leave requests user should be assigned as a
Leave AdminorLeave Manager. - To recieve time entry requests user should be assigned as an
Attendance AdminorAttendance Manager.
:::
Assigning Teams
- User have the felxibility to assign multiple teams for an employee.
- Use the dropdown to assign the employee to one or more teams.
- If a team doesn’t exist, click the Add New Team link to create and assign a new team.
Career Progression
Following fields need to be complete to add a career progression record.
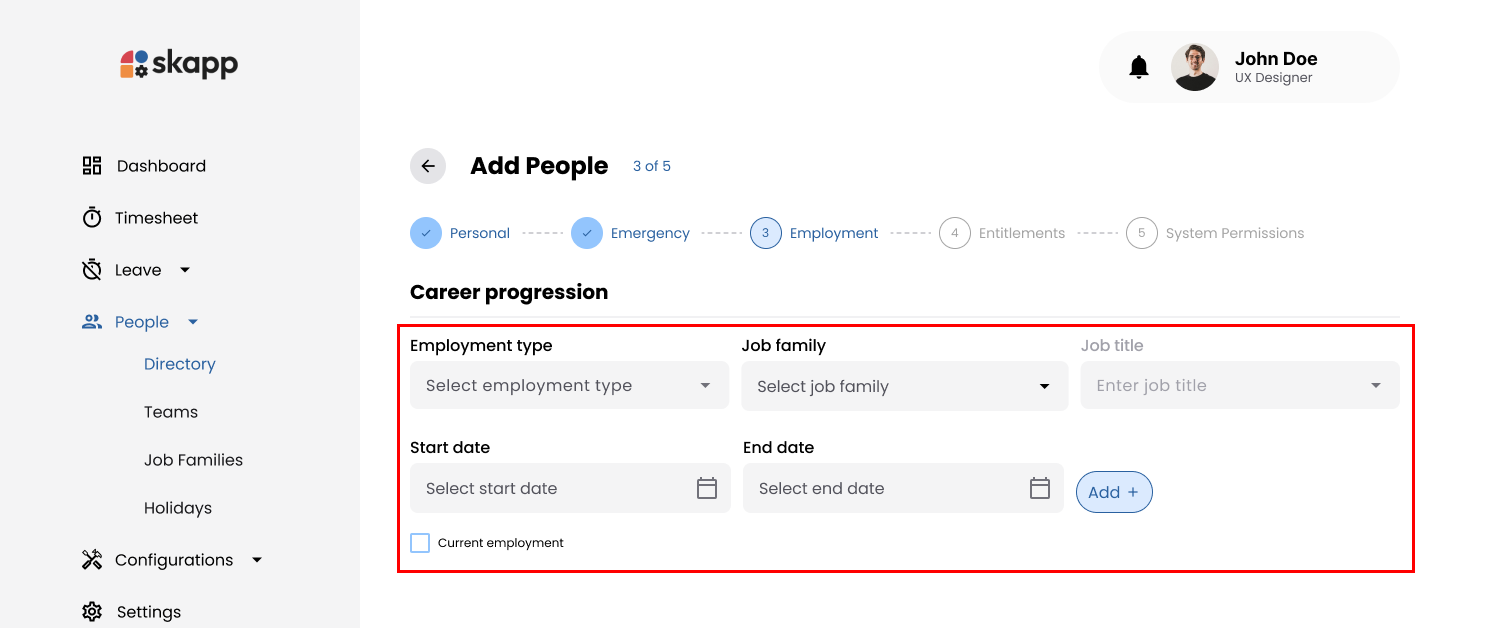
-
Employment Type
- Select from dropdown options:
- Intern
- Permanent
- Contract
- Placeholder: Select employment type
- Select from dropdown options:
-
Job Family
- Select a job family from the dropdown.
- Add Job Family: If the required job family does not exist:
- Click the Add Job Family option at the end of the dropdown list.
- The system opens the Add Job Family modal.
- Upon saving, the new job family is pre-selected in the dropdown.
-
Job Title
- This field is enabled only after selecting a job family.
- Select a job title from the dropdown.
- Add Job Title: If the required job title does not exist:
- Click the Add Job Title option at the end of the dropdown list.
- The system opens the Add Job Title modal.
- Upon saving, the new job title is pre-selected in the dropdown.
-
Start Date
- Specify the start date for the job role using the date picker.
- Placeholder: Select start date
-
End Date
- Specify the end date for the job role using the date picker.
- If the role is marked as the current employment, the end date field is disabled.
- Placeholder: Select end date
-
Current Employment
- Use the checkbox to mark the record as the employee's current role.
- If selected, the end date field is disabled.
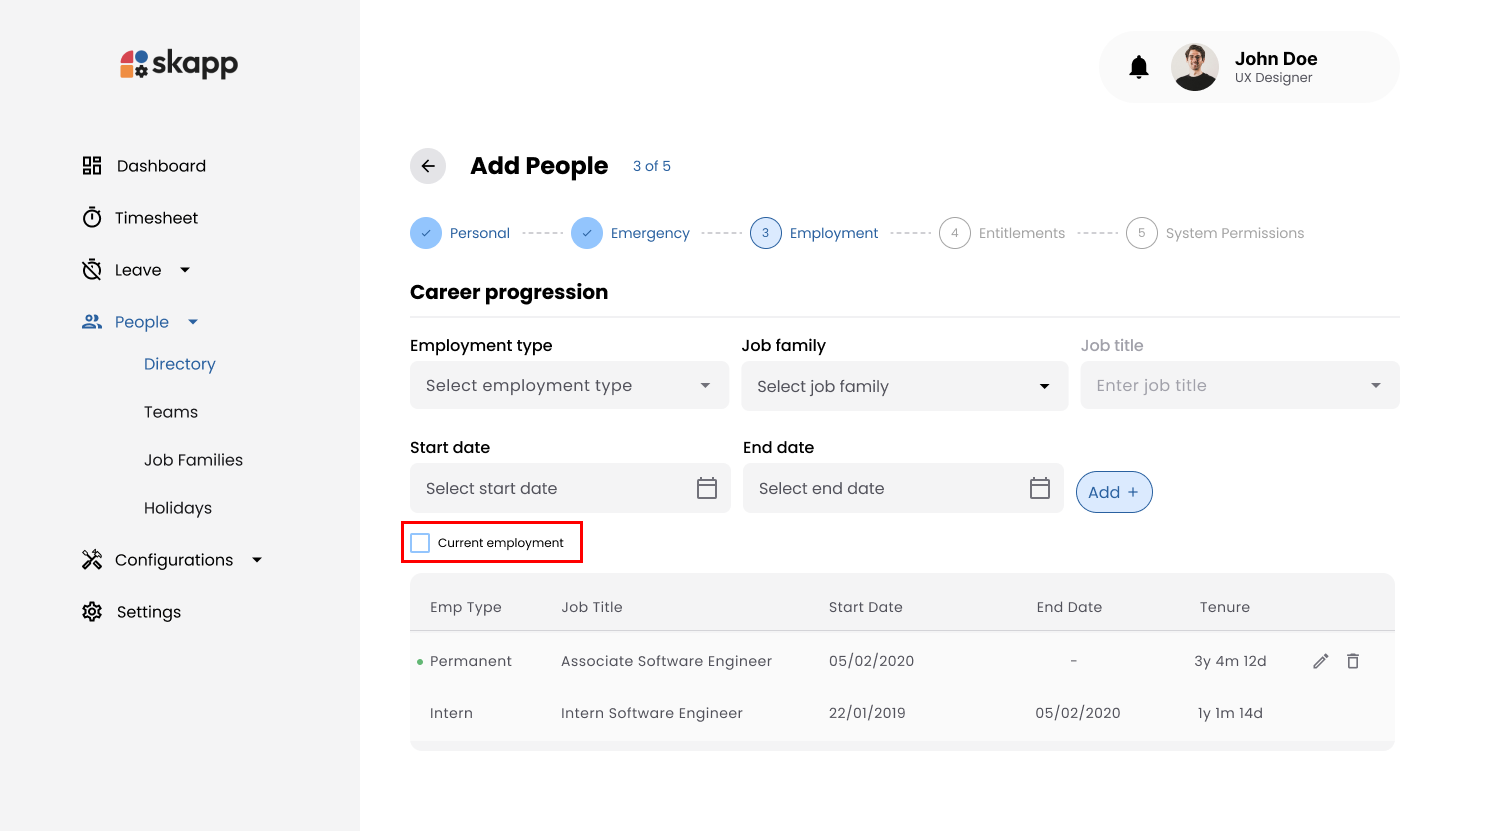
Adding a Career Progression Record
- Fill in all the required fields as described above.
- Click the Add button.
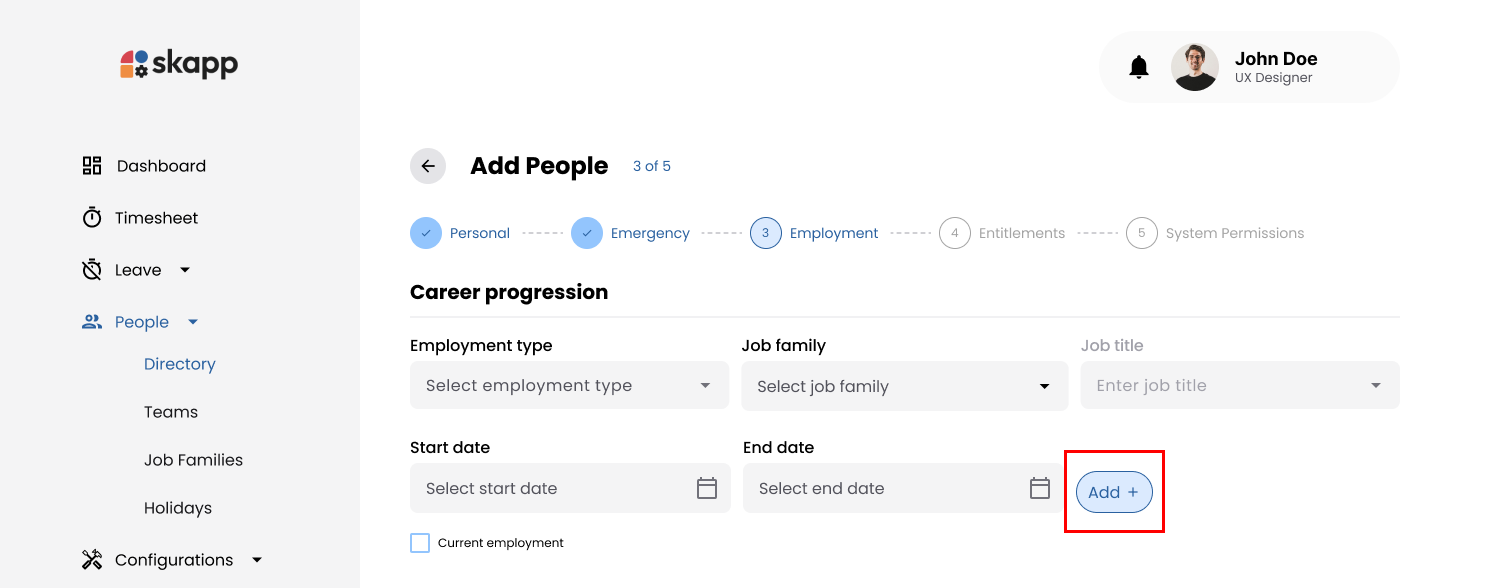
- Upon successful addition:
- The record is displayed in a table below the form.
- All input fields are cleared, ready for the next entry.
Editing Career Progression Records
- Locate the record in the table.
- Click the Edit button next to the desired record.
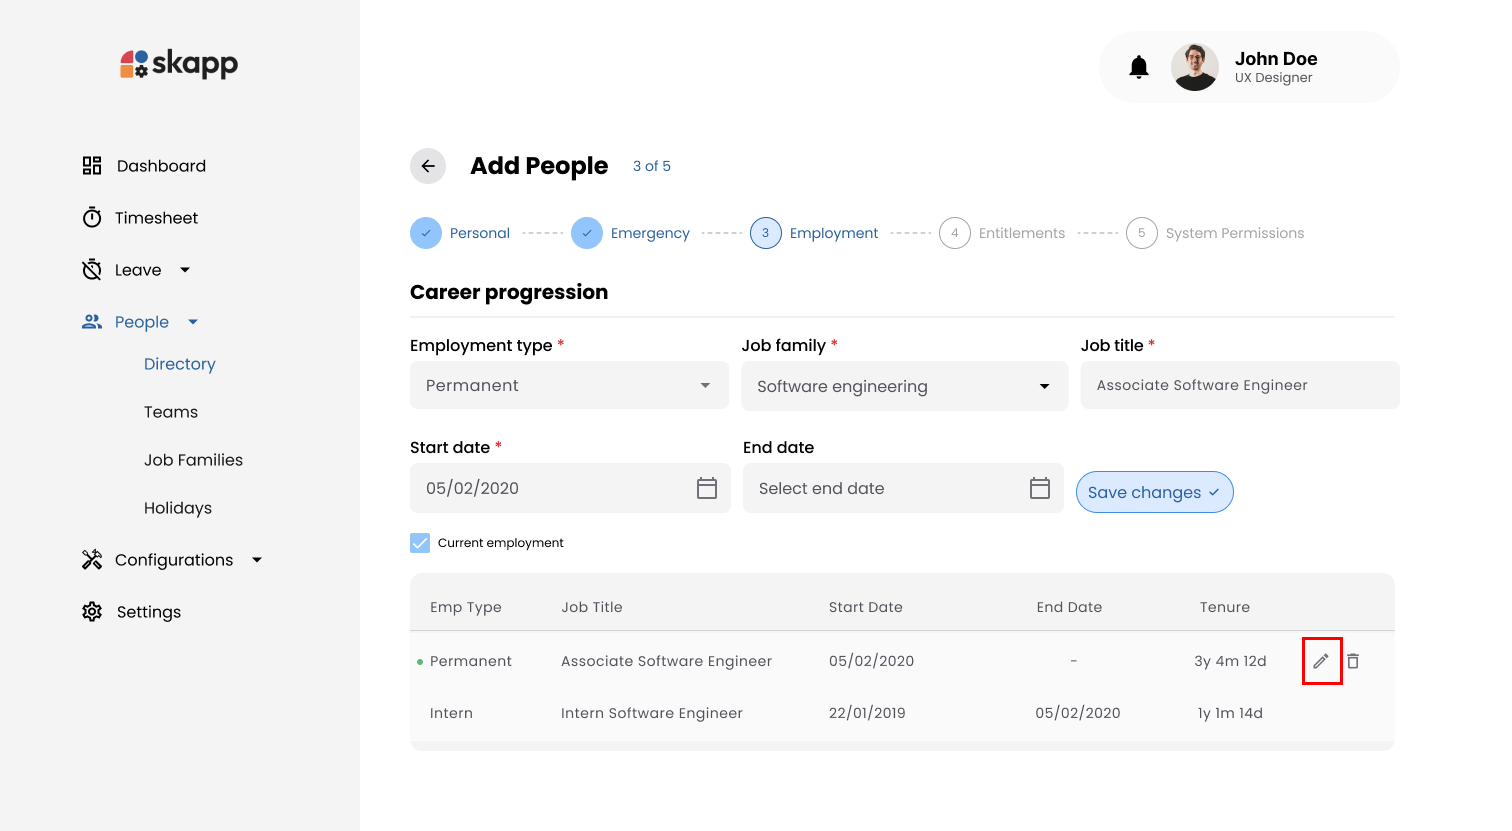
- The record's details will populate the input fields.
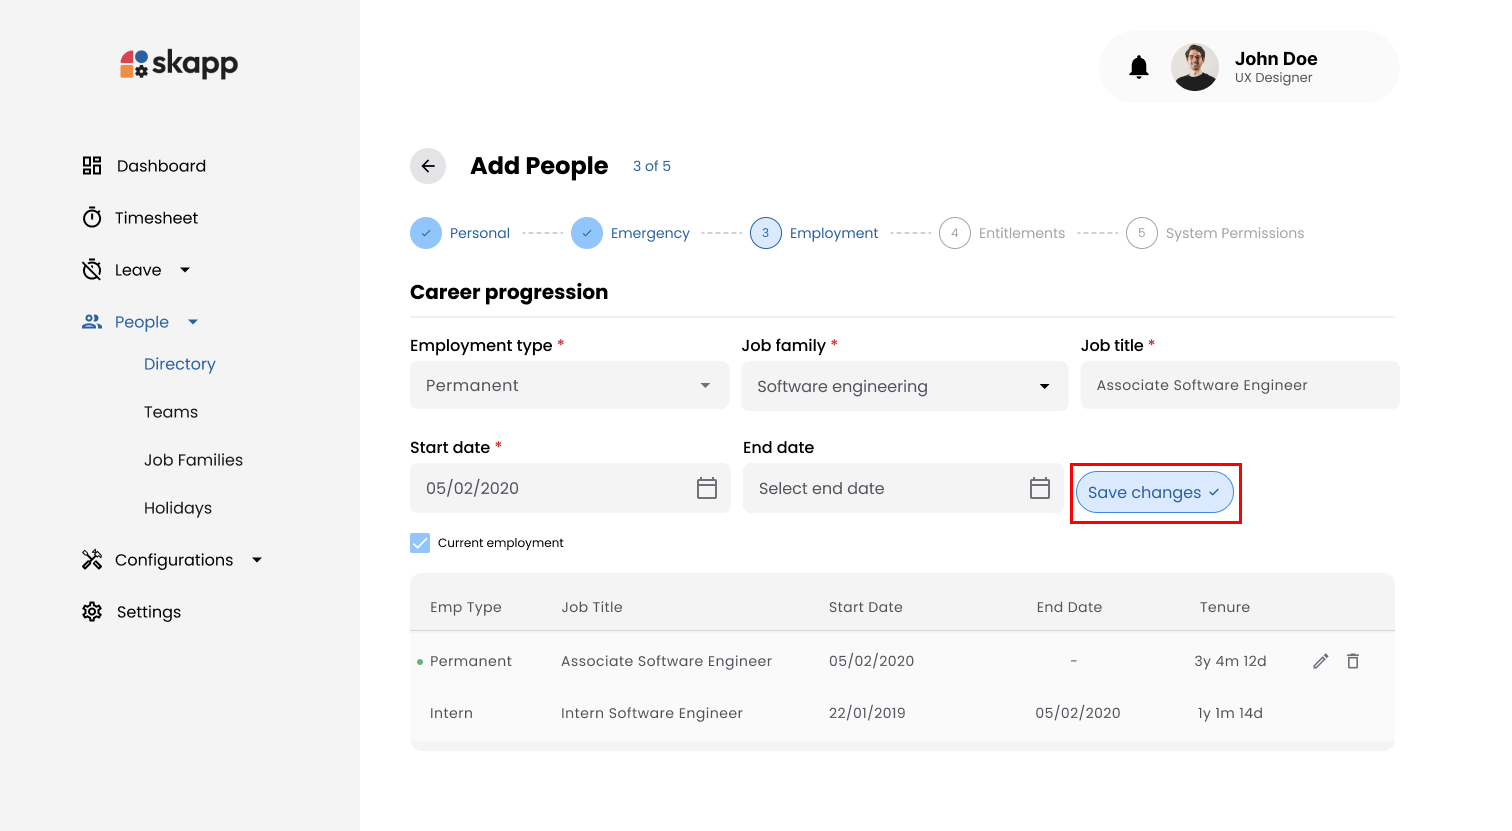
- Modify the details as needed.
- Click Save Changes to update the record.
Deleting Career Progression Records
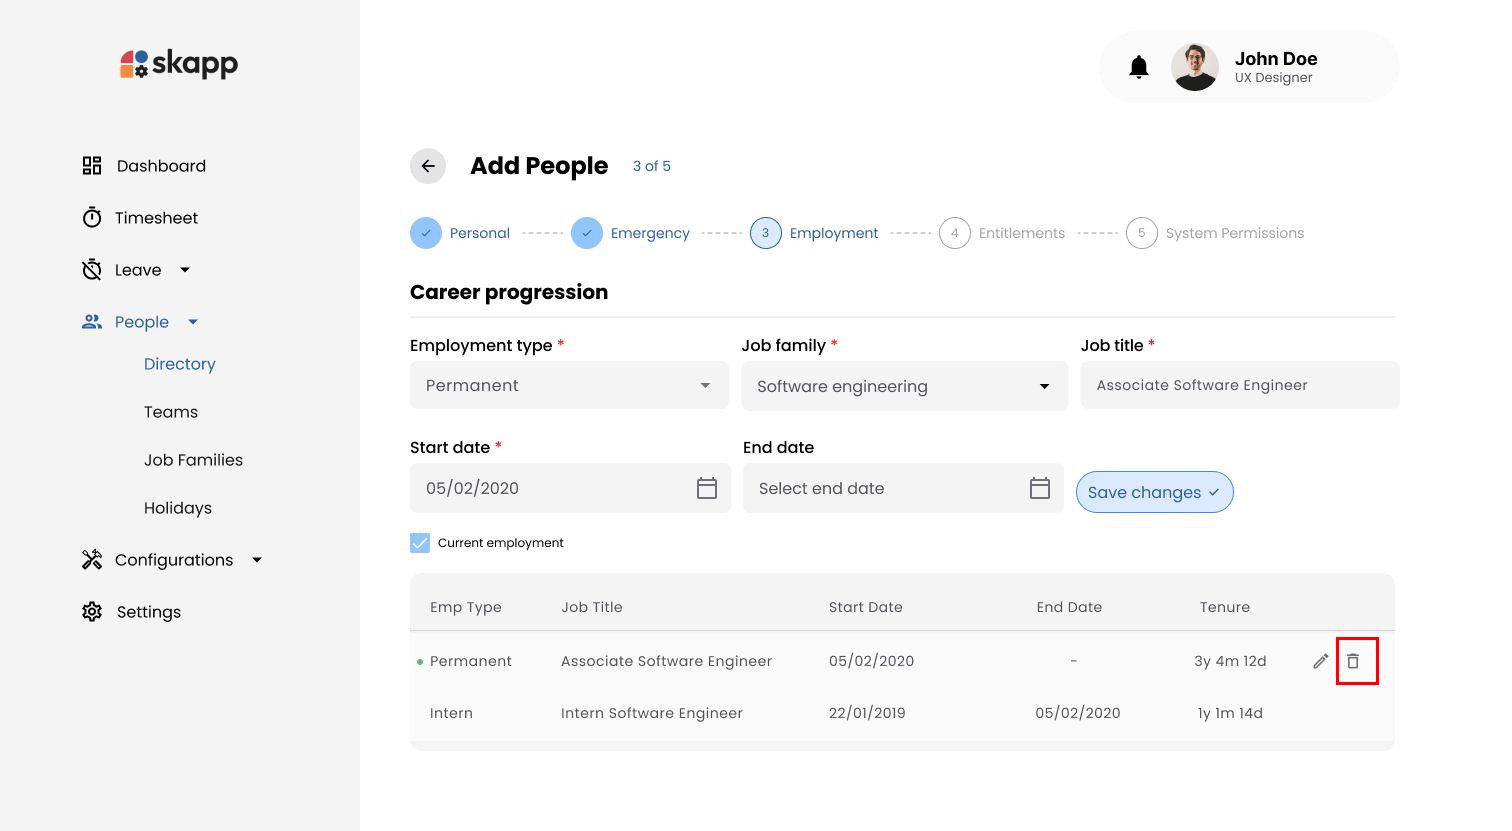
- Locate the record in the table.
- Click the Delete button next to the desired record.
- The record will be removed from the table.
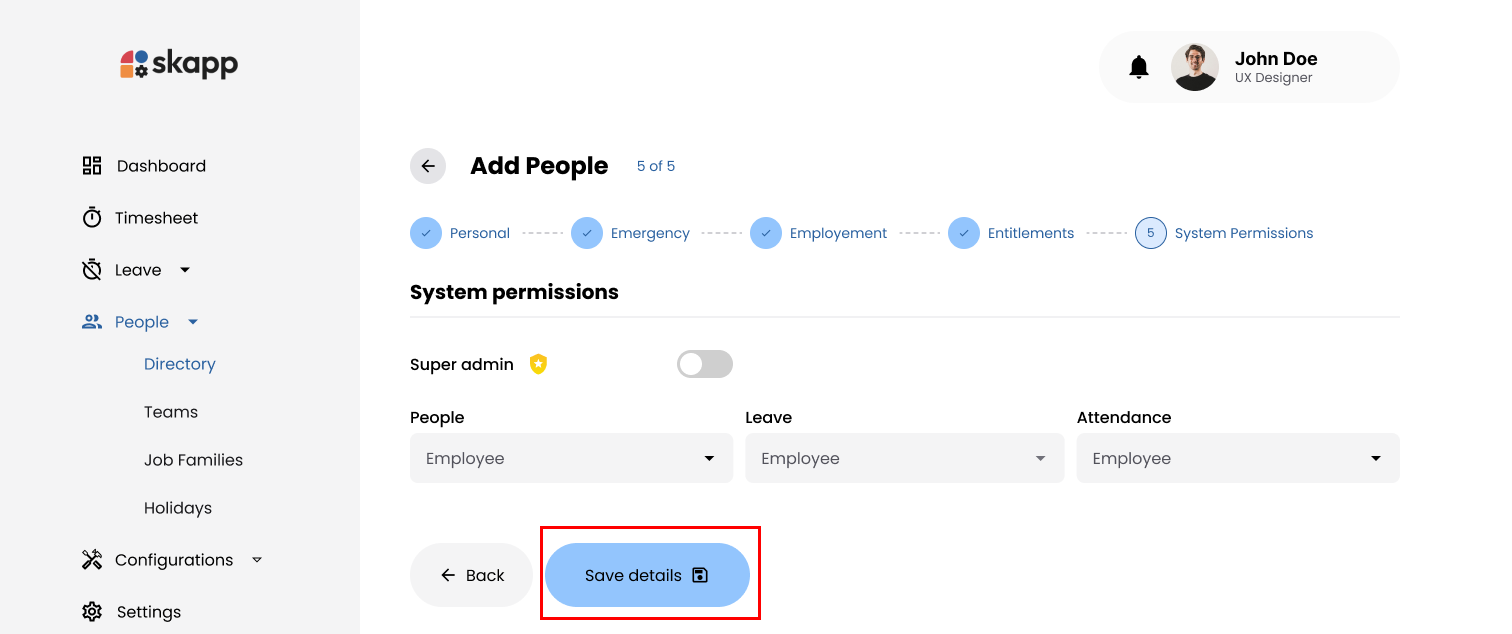
Step 4: System Permissions
The System Permissions section determines the user’s access level for various modules.
Role Assignment
- By default, all modules are set to the Employee role.
- Modify roles for each module by selecting from options like Employee, Manager, or Admin.
Super Admin Permission
- Toggle the Super Admin option to grant full administrative access.
- Enabling this option automatically assigns the Admin role for all modules and locks further changes to module-specific roles.
Step 5: Entitlement Details
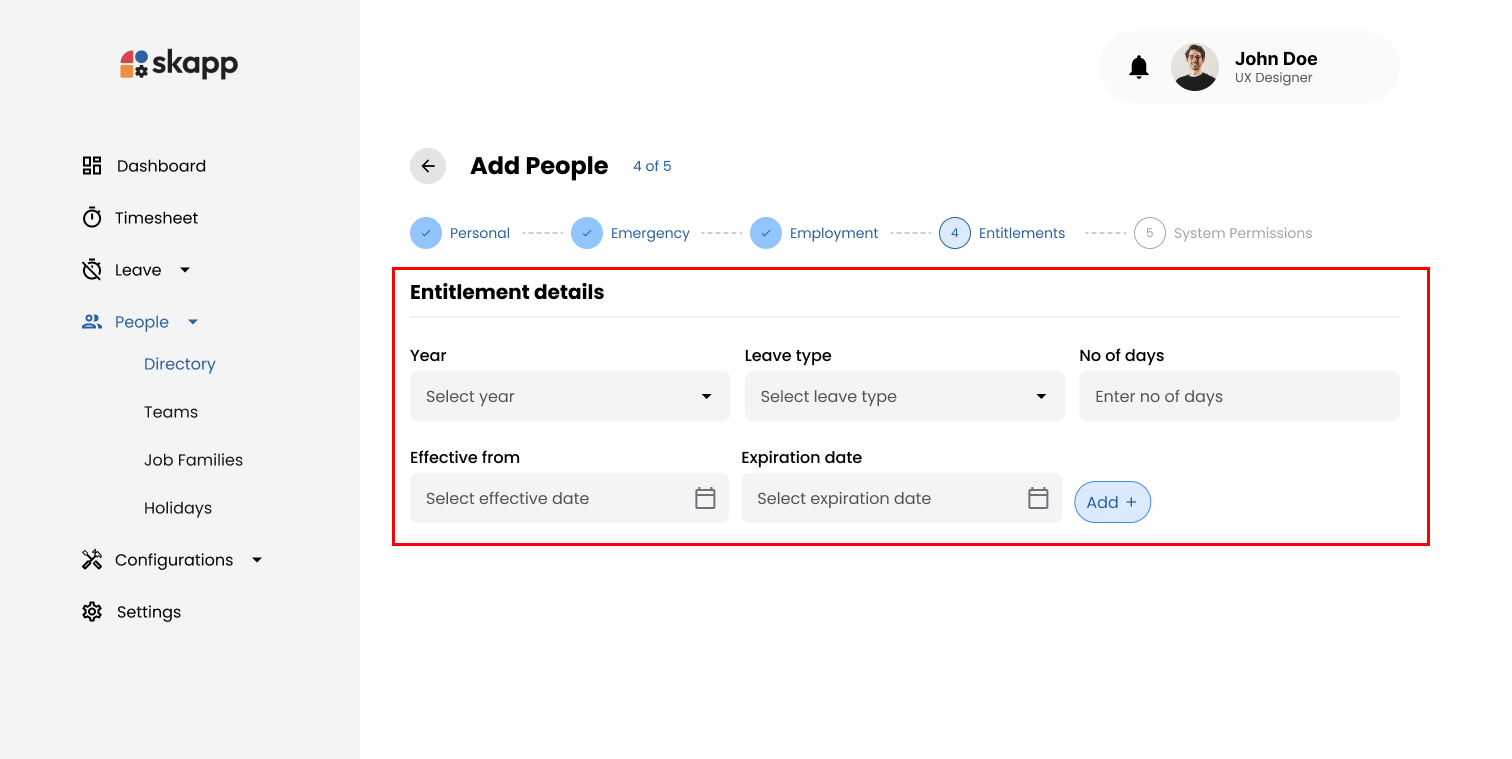
The Entitlement Details section allows administrators to assign leave entitlements for the employee.
Adding Leave Entitlements
- Select the Year for which the entitlement applies.
- Choose the Leave Type from the dropdown.
- Specify the Number of Days allocated for the leave.
- Define the Effective From and Expiration Date for the entitlement.
Adding Multiple Entitlements
- Click the Add button to save the entry.
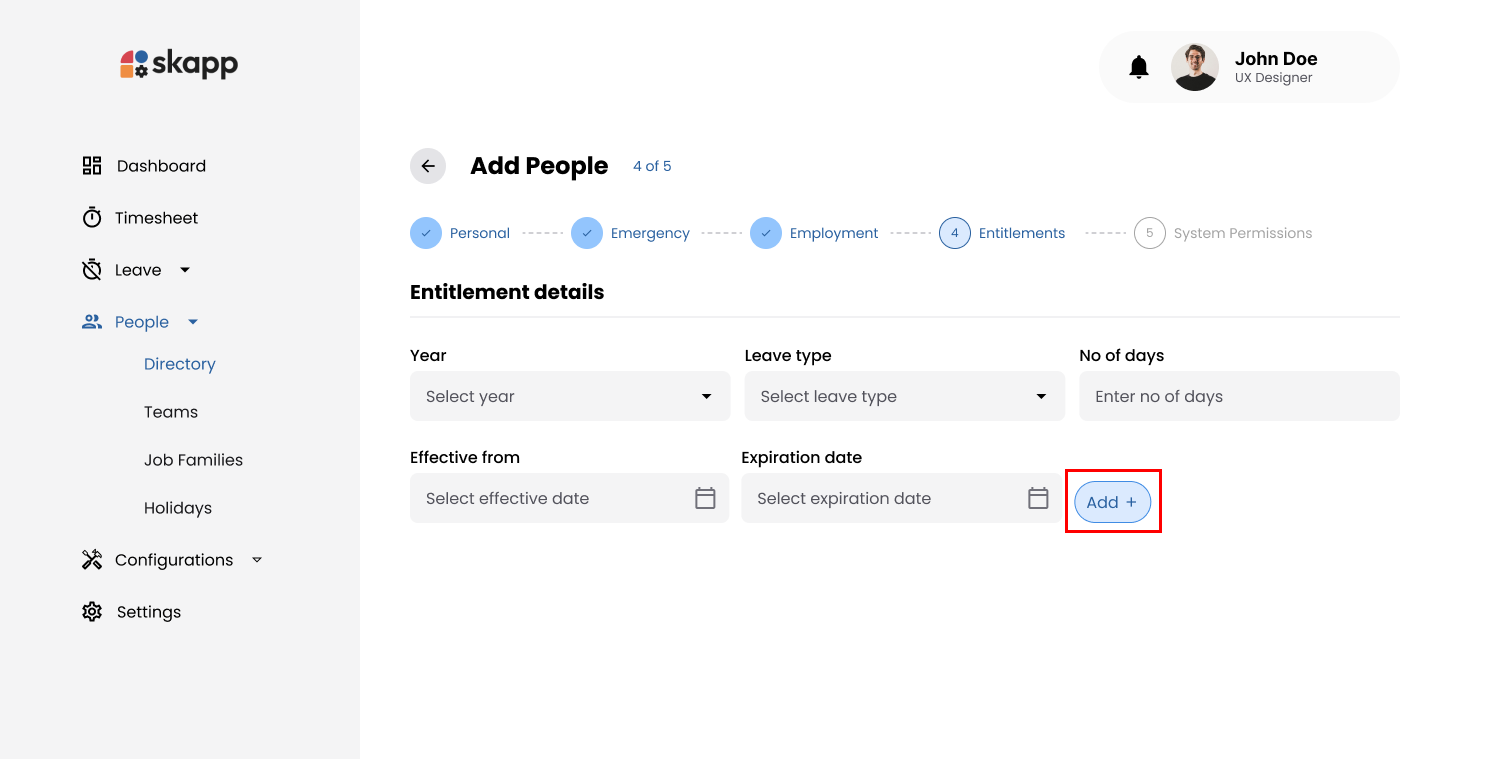
- The entitlement appears in a table below the form.
- Repeat the process to add multiple entitlements.
- Multiple records for the same leave type will be merged into a single record with the cumulative number of days, provided the effective and expiration dates are the same.
Delete Added Entitlements
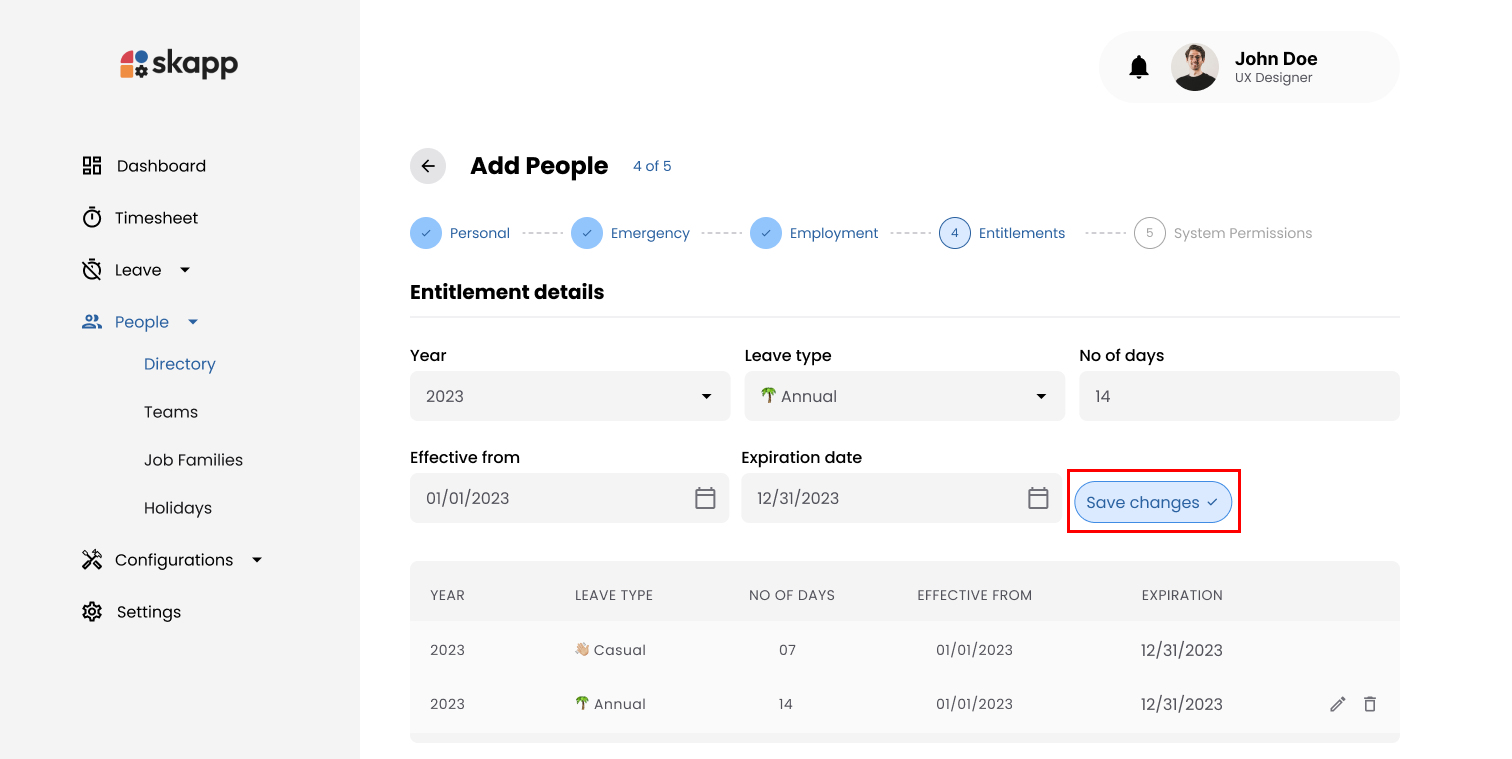
- Click the Edit icon next to an entitlement to modify details.
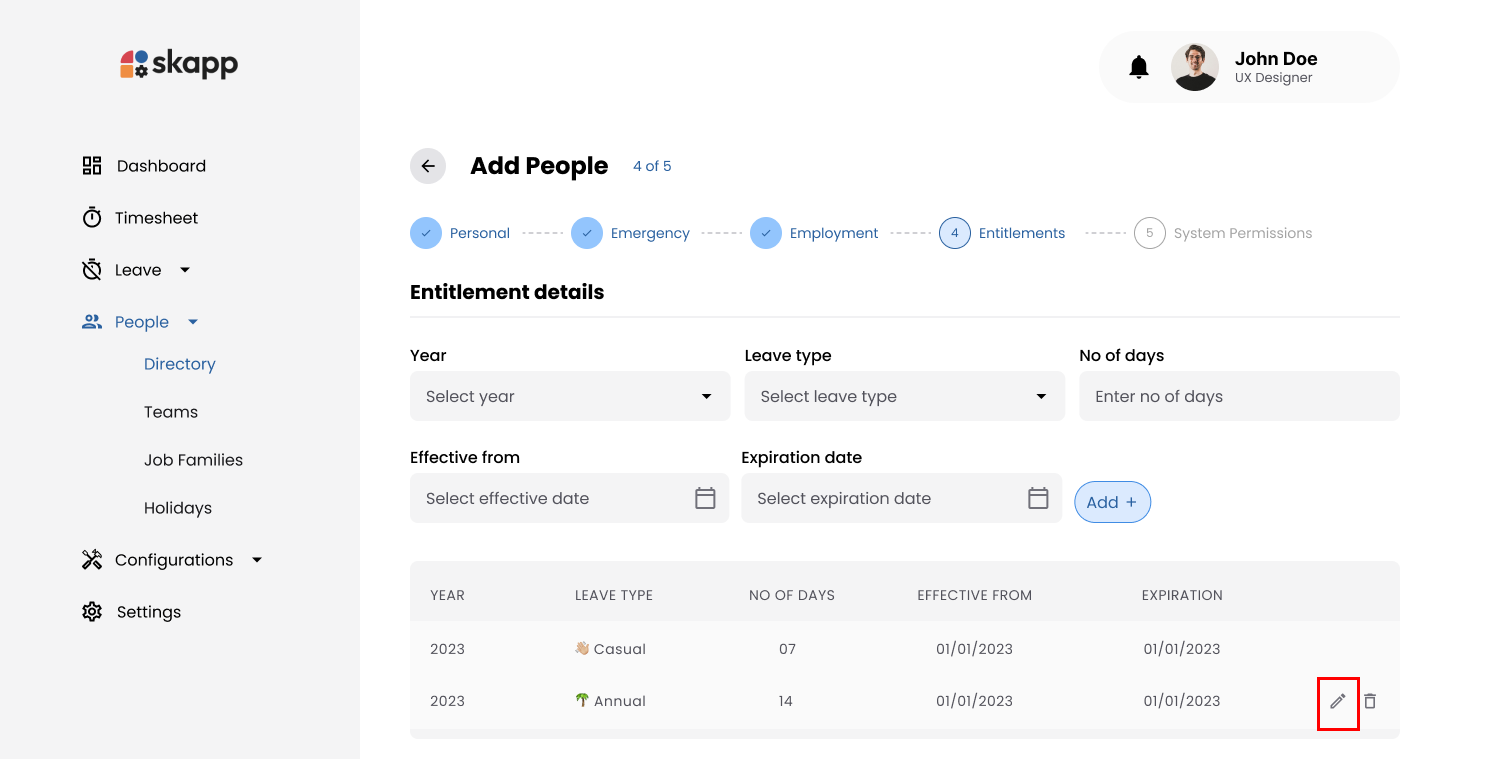
- Click on the save changes button when modifying is done.
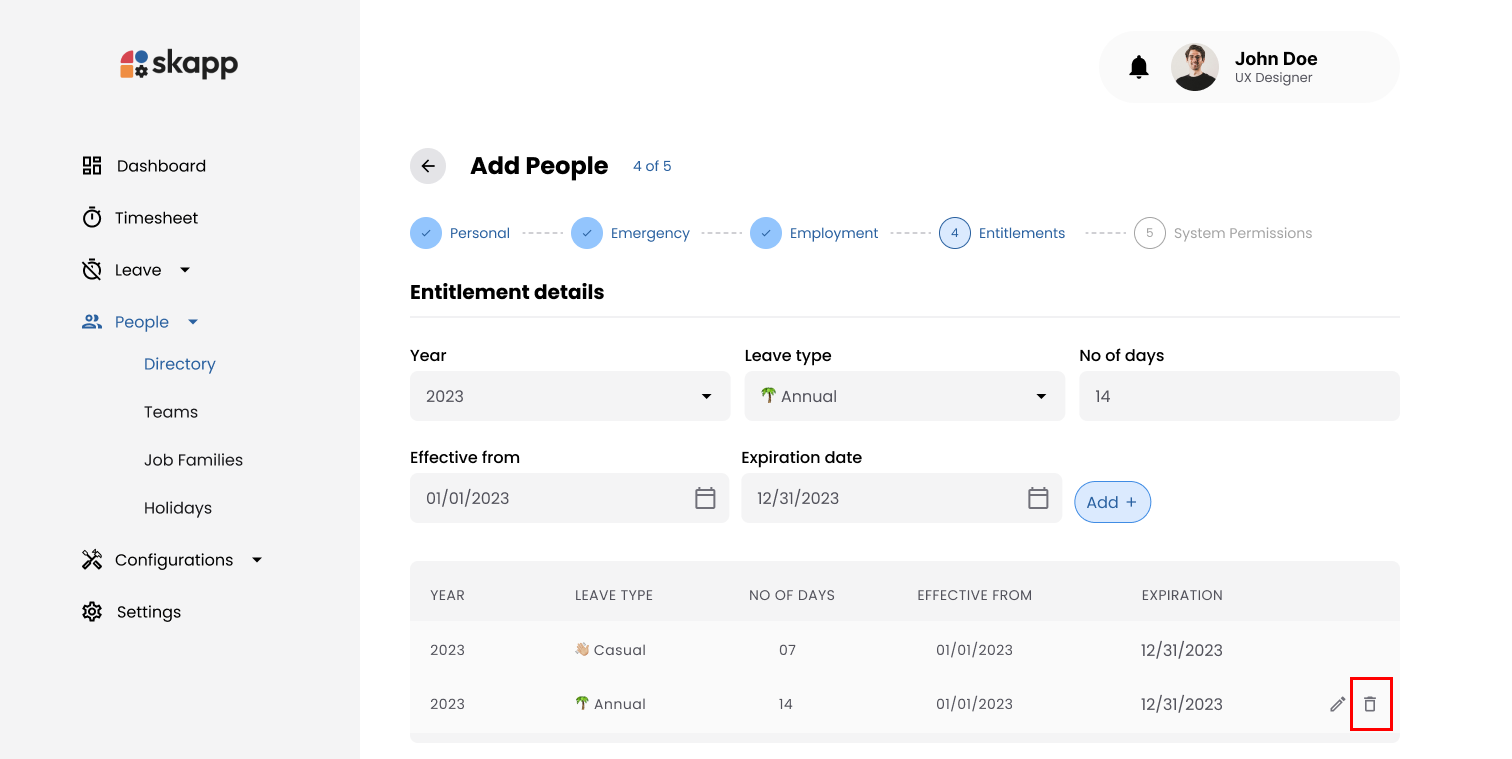
- Click the Delete icon to remove the entitlement from the list.
Step 6: Save the User
After completing all sections:
- Review the entered information.
- Click the Save Profile button to finalize the process.
- The Share Credentials Modal appears with:
- Account URL: The login page link.
- Username: The user's work email.
- Password: A temporary password.
Steps 4: Share Credentials
- Click Copy Text to copy the credentials for sharing with the user.
